How to Publish a local page
Step 1: Create a Template
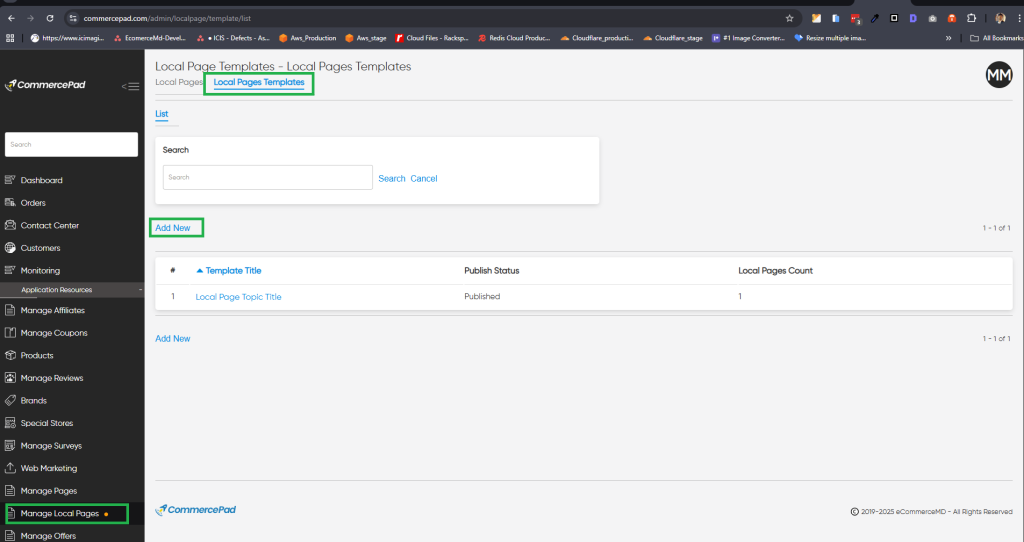
To begin creating local pages for different cities or states, you first need to set up a template.
- Log in to the CommercePad Admin.
- In the left-hand menu, under “Application Resources,” click on “Manage Local Pages.”
- At the top of the page, click on “Local Pages Templates.”
- Click “Add New” to create a new template.
- Fill out the required fields and save your template.
- Add any necessary widgets to your template and publish it.
- Use the following tokens in your template wherever applicable: {{city}}, {{country}}, {{state}}, {{stateCode}}, {{countryCode}}.
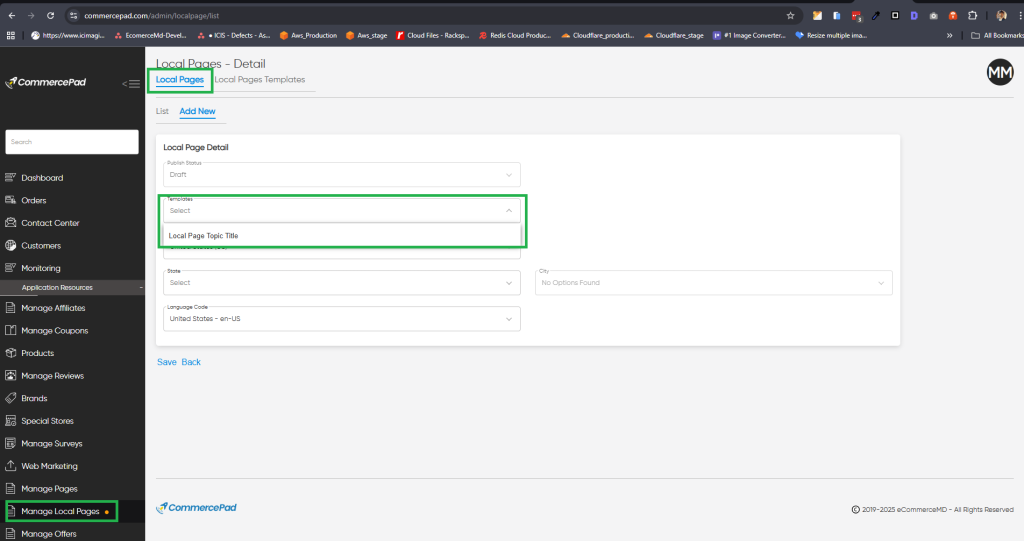
Step 2: Create a local page using the template
- In the CommercePad Admin, go to “Manage Local Pages” under “Application Resources” in the left-hand menu.
- Click “Add New Page.”
- Select the template you created from the dropdown menu.
- Fill in the other fields such as country, city, state, etc., and save your page.
- Your local page will be created using the template, automatically replacing the tokens (
{{city}},{{country}},{{state}},{{stateCode}},{{countryCode}}) with the corresponding information. - Publish the changes to make your local page live.